Friday, November 9, 2012

A CALL TO ACTION


A personal commentary.........

In the past few days, I've noticed 2 Chronicles 7:14 tossed around on facebook as if prayer is the only way to heal our nation, but we have to look deeper.  Immediately preceding this verse is 2 Chronicles 7:13, which reads:  “When I shut up the heaven and there is no rain, or command the locusts to devour the land, or send pestilence among my people”.  The word pestilence stems from the Latin root pestilens < pestic, which translates to either pestilence or pestilent.  Webster’s defines pestilent with five definitions.  They are: 


1. Tending to cause death: Deadly
2. Likely to cause an epidemic
3. Contaminated
4. Morally, socially, or politically harmful
5. Causing disfavor or annoyance

While all five definitions can be applied to the state of our country today, definition number 4 really struck a chord in my studies today.

2 Chronicles 7:14 reads: “if My people who are called by My name will humble themselves, and pray and seek my face, and turn from their wicked ways, then I will hear from Heaven, and will forgive their sin and heal their land” (emphasis mine).

You see, God instructed us not only to pray.  He told us what he would do when we've turned from Him so that we will have signs to know when we’re on the wrong path.

Verse 14 is often quoted but apparently not fully understood.  This is a wonderful promise from God that we are His and that He loves us; but he has given us very specific instructions:

            We are to Humble ourselves.
            We are to Pray.
            We are to Turn from our Wicked ways.

Then he will hear, forgive, and heal.

Furthermore, in 2 Chronicles 19-20 (CEB), God says, “But if any of you ever turn away from and abandon the regulations and commands that I have given you, and go to serve other gods and worship them, then I will uproot you from My land that I gave you, and I will reject this temple that I made holy for my name.  I will make it a joke, insulted by everyone.”

There you have it, folks.  We, as a nation, have been so busy worshiping the gods of self, money, and “choice,” that we missed our cue from Heaven that it is time to TURN FROM OUR WICKED WAYS!  The United States of America is the laughing stock of the world today, just as Ezra wrote more than 2, 400 years ago.

In this country today, we regularly distort God’s word to make it fit into our lives, instead of turning our lives to fit God’s word.  We cannot pick and choose which parts of scripture apply to us, it’s an all or nothing deal.

We don’t hold ourselves, our children, our families or our friends accountable.  We call it forgiveness.  While we are to forgive each other for hurts (real or perceived) committed against us personally; only God, through the blood of Christ, can forgive sin.  This doesn't mean that we should hate people who refuse to repent of their sins; we are to love our enemies as we love ourselves, but we cannot continue to condone sin in our society.  We've all heard it before:  “Hate the sin; LOVE the sinner”.

We don’t teach our children that sex is sacred and should only be shared with their spouse.  Instead, we allow our government to teach them that sex is just a pleasurable pass-time and allow them (public schools and government clinics) to provide prophylactics to our children “to keep them safe”.  The argument is that kids are going to have sex whether we want them to or not – but they WON’T if every Christian in America takes a stand and teaches their children that sex is a sacred and holy gift from God and not to be taken lightly and used casually.  But that’s not all.  We must also SHOW them, by not partaking in pornography, or having extra-marital affairs, or living with our partners outside of the boundaries of marriage.  We have to lead by example.  “Do as I say and not as I do” does NOT work, and it makes us hypocrites (whom even Jesus disdained, by the way).

We don’t value life in America, whether it’s the life that was taken over a spilled beer in a bar, or the life of an unborn child – it is viewed with the same disregard from society.  I see Americans putting more value on the life of a stray dog, than I see for the life of a child.  Yes, EVEN the babies conceived in rape cases. 

God does not condone violent crimes, but Romans 8:28 says, “And we know that all things work together for good to those who love God, to those who are called according to his purpose.”  It goes on to say in verses 29-30, “For whom he foreknew, He also predestined to be conformed to the image of His Son, that He might be firstborn among many brethren.  Moreover whom He predestined, these He also called, these He also justified; and whom he justified, these He also glorified” (again, emphasis mine).  So you see, God does not make mistakes.  He takes the horrible circumstances in our lives and uses them for good.  That child is the good that comes from that which is bad.  That child is justified and glorified in God’s eyes.  It is NOT okay to murder a baby because it is inconvenient!!!  It is NOT ABOUT YOU!!  Americans were outraged over the Casey Anthony trial and its outcome, but there is NO DIFFERENCE between the fate of Caylee Anthony, in comparison to the fate of an aborted baby. 

How could God heal our land while we continue to place our hearts on our own selfish lives?  He can’t!!  He can’t because He is Holy and perfect and to do so would be a compromise of His character.  Wake up, Christians – Wake up, America!!

Fortunately for us, we serve a God of mercy and grace who promises to forgive our sin and heal our land – all we have to do is written right there in 2 Chronicles 7:14.
           
We are to Humble ourselves.
We are to Pray.
            We are to Turn from our Wicked ways.

It’s good news!  The bible is full of people who thoroughly messed up, yet, they repented and TURNED AWAY from their sin and God redeemed them.  In some cases even exalted them and made them great leaders.  We CAN be restored but it’s going to take a lot more than just prayers.  It takes action from the body of Christ.  We are His hands and feet.  We can walk around all day long acting righteous and holy in front of our peers; but if we’re making sinful choices in the dark where we think no one can see, then we have NOT turned from our wicked ways.  If we’re making choices condoning sin, then we have NOT turned from our wicked ways.  If we’re making choices based on how the outcome will affect us personally, instead of how it will affect the Kingdom of God, then we have NOT turned from our wicked ways.  If we consent to atrocities in our society by remaining silent, or by quietly overlooking them for selfish gain, then we have NOT turned from our wicked ways.

The choice is clear, Christians.  We are at a crossroads – will we repent or will we continue along the same well worn path of recent history?  Are we going to continue to pray publicly and sin privately?  Isaiah 50:11 in the Amplified bible warns, “Behold, all you [enemies of your own selves] who attempt to kindle your own fires [and work out your own plans of salvation], who surround and gird yourselves with momentary sparks, darts, and firebrands that you set aflame! – walk by the light of your self-made fire and of the sparks that you have kindled [for yourself, if you will]!  But this shall you have from My hand:  you shall lie down in grief and torment.”

We have put our faith and our trust in the wrong god – collectively.  The president has no power over us, good or bad – neither would have any other man or woman elected to the office.  God is the one who is in control.  He doesn't make mistakes.  My personal opinion of either candidate in this recent election does not matter.  We could have elected Big Bird with the same results.  Until we repent of our sin and turn away from it, God’s hand of protection and mercy will remain removed from our land.  It’s in His word and could not be more clear.

Lastly, we are not doomed as individuals.  Psalm 37:3 says, “Trust in the Lord and do good.  Then you will live safely in the land and prosper.”  (I think its noteworthy here to point out that even in this tiny little verse, there is a call to action -- DO good, not BE good.) 

We, the people, can overcome the curse on our land; one Christian at a time, one household at a time!  Eventually, the rest will see the blessings that we live in and they will want what we have.  Read your bible, study God’s word, and be prepared to embrace the seekers.  Teach them your “secret”; then we, the United States of America, will see redemption and prosperity again.

~Trixie J. Ferguson

Monday, September 24, 2012

Soft and Fluffy Kaiser Rolls

I've been wanting to try my hand at Kaiser rolls for a long time.  I'm not that big of a fan of the grocery store rolls, but I used to live next to a diner that made them fresh every day and they were to DIE for.  Well, I've moved over 1000 miles away from that little diner, so if I want fresh baked Kaiser rolls, I guess it's on me to make them. (0=

I found two recipes that I thought sounded interesting but I didn't really like the entire recipe of either, so I've snipped away at both and combined them to make a truly delightful recipe.  These came out PERFECTLY!  


*The first recipe came from Food.com and the other from Taste of Home, in case your interested in my inspiration for this recipe.

First up, what you'll need:

2 Tbsp active dry yeast

2 1/2 cups warm water (110 to 120 degrees F)
2 Tbsp shortening (you could use oil but it does make a difference)
1 Tbsp sugar
2 tsp salt
6 - 7 cups flour (bread flour is best but All-Purpose is fine)
3 egg whites

Then, for the egg wash before baking:
1 egg white, beaten with a splash of cold milk

topping of your choice (poppy seeds, caraway, etc.)

Directions:

Beat egg whites until very stiff and firm, set aside.

Egg whites - all whipped up


Combine yeast and warm water in the bowl of your stand mixer and let sit for about 5 minutes or until yeast starts to bloom.  
Yeast Bloom

In the mean time, cream together sugar, salt and shortening in a small bowl.  
Shortening, salt and sugar
all creamed together

When yeast is in full bloom, add shortening mixture and 3 cups of flour.  Using your paddle attachment, mix dough for 2 minutes or until it comes together. 


This is what dough should
look like before egg whites
addition.


Remove bowl from mixer and fold in your egg whites.  (I know that we will lose some of the air from the egg whites as we mix and knead in the rest of the flour - believe me, I was skeptical - but this really makes a huge difference in the lightness of your rolls when they're done.)  
Switch to Dough Hook

Return bowl to mixer and switch over to your dough hook.  Gradually add flour, incorporating on LOW speed as you go, in 1/4 cup increments until dough comes together and starts pulling off the sides of the bowl.  

Dough ready to knead by hand.

Pour dough out onto a floured work surface and knead by hand an additional 3 to 5 minutes until dough is smooth and elastic.

You will know it is ready because as you fold and push the dough while kneading, it will begin to spring back more forcefully and will literally fight you to keep it's shape.  Slightly oil the surface of a large (I do mean LARGE) bowl and place the dough in the bowl.  Flip the dough once so that the top side is oiled.  Take a kitchen towel and wet it under HOT tap water, cover the bowl and set it in a warm, draft-free place to rise until doubled (about an hour).

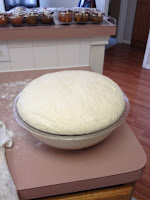
Dough, ready for 1st rise

I live in South Texas where we run the air conditioning 24/7 until mid- to late-October, so there really isn't a warm place in my home.  On the other hand, it is always warm and muggy outside, so I generally place my covered dough on top of my chest freezer in the garage to rise.  It's like MAGIC letting it rise in this humid atmosphere.  Here is what my dough looked like after one hour in my garage.


Dough after First rise
After your dough has doubled (as you can see, mine went WAY more than double), punch it down but try not to work it too much.  Flip the dough in the bowl again, re-wet your towel with hot tap water, cover and let rise again for about 40 minutes.


Dough after 2nd rise

After the 2nd rise, you'll want to punch the dough down again and turn it out onto a floured surface.  Roll it out either with your hands or a rolling pin to about a 12 inch square.  Cut the dough into 16 equal pieces.  

Line two baking sheets with parchment paper.  Roll each piece of dough into a ball and place on parchment paper approximately 2" apart for the final rise.  Once all the dough is placed on the pan, re-wet your kitchen towel with hot tap water and cover the rolls again.  Let them rise one last time for about 30 minutes.  


Rolls ready for final rise
Egg wash and toppings
(running out of clean
places for pictures - haha)
In the meantime, heat your oven to 400 degrees F.  Whisk together your last egg white with a splash of milk until it's a little frothy.  

Ready to Bake
Once your rolls have risen for their final rise, uncover and brush the rolls with the egg wash.  Sprinkle toppings of your choice over the rolls.  I've used sesame seeds on one pan, and caraway seeds on the other.  
If you're like me, your regular kitchen oven isn't large enough to accommodate two large baking sheets on the center shelf.  I have situated one shelf in the center of the oven, and the second shelf, on the topmost shelf height. (Please don't look at my dirt in the oven - it's on my list but this is much more fun, don't you think?)

Bake at 400 degrees F, for 15 to 20 minutes or until golden brown.  Mine took the full 20 minutes but I'm at sea level and it's pretty humid in these parts so watch your rolls after 15 minutes.

I started with one pan on the center rack and the other on the top.  At the halfway point of the baking time (10 minutes), I switched the pans so that my rolls would all have a chance to cook evenly.


And FINALLY.......after much ado, I give you>>>


Fresh from the oven, Soft and Fluffy Kaiser rolls!!

Yield = 16 rolls

You could get more or less depending on what size you make them, I would guess you could get up to 2 dozen slider sized rolls from this recipe.


Lastly, I'm not really very tech-savvy, so I don't know how to embed a printable recipe in this post so, if you're interested in a printable format, email me at txtoco2002@yahoo.com and I will send it to you.

Thanks for checking in and happy baking!


Thursday, September 20, 2012

Simply the BEST Chocolate Chip Cookies

I'd been craving chocolate chip cookies for several days.  I don't know about you, but when I'm craving a specific something - nothing else will do.  I tried some Oreos, some chocolate candy, some breakfast cereal bars, and probably a few other things but the chocolate chip cookie monster was still screaming from somewhere deep inside, demanding to be satisfied.  So, I pulled out my trusty recipe and got started.

This recipe is not hard at all, but do plan ahead as they turn out much better if you take the time to chill the dough as directed.  They just seem to flatten out and become hard faster if you skip this step.  It's also a lot easier if you use a stand mixer to mix the dough as it is quite thick at the end of the process.  It can be done manually, but I hope you've been working out because it'll take a strong arm.  LOL.

Here's what you'll need:

2/3 cup shortening
2/3 cup butter, softened
1 cup granulated white sugar
1 cup packed brown sugar (dark will make your cookies moister)
2 eggs (best if room temperature)
2 tsp vanilla extract
3 1/2 cups all-purpose flour, divided
1 tsp baking soda
1 tsp salt
2 cups semi-sweet or milk chocolate morsels
1 cup roughly chopped pecans

Directions:

In the bowl of your stand mixer, cream shortening, butter and sugars until light and fluffy.  You may need to scrape down the sides a couple of times until it's all incorporated.  Beat in the eggs and vanilla.  At this point, you're going to want to change from the whisk attachment to your paddle attachment.

In a separate bowl, combine 3 cups of flour, baking soda, and salt.  Mix into the sugar mixture in batches until well incorporated.   If the dough seems very wet, gradually add in more flour until the dough appears workable. Be careful though, too much flour will result in a crisper cookie.  Finally, add your chocolate morsels and chopped pecans and stir them in on low speed.  (Note: your mixer bowl will be FULL).

Cover the dough with plastic wrap and chill for at least an hour.

When your dough is thoroughly chilled, set your oven to 375 degrees F to preheat.  Lightly grease a baking sheet and drop dough onto sheet by 1/8 cupfuls at least 1 inch apart.  (The original recipe called for 1/4 cup sized cookies but those come out just HUGE.)

As you can see, 1/8 cup is still a substantial sized cookie (0=

Bake for 13 - 15 minutes or until cookies are light golden brown.  Cool 5 minutes on baking sheet before removing to a wire rack to cool completely.

The reasoning behind leaving the cookies on the sheet for a full 5 minutes is that as they start to cool, the cookies will create some steam which will then be absorbed by the bottom "crust" of the cookie helping them to stay moist longer.  I've taken them off too soon and found that by the following day, the cookies were very hard.  So, that being said, I'm a believer in the "leave them on the cookie sheet" school of thought.  


This recipe will yield approximately 2 dozen cookies depending upon how religious you are about measuring your dough out onto the cookie sheet and how tightly you pack it in.

Every time I make these, my husband says that they are the best chocolate chip cookies I've ever made.  I think he just forgets how good they are in between batches.  (0=

I hope you try these and enjoy them.


Wednesday, September 19, 2012

Kaytucky Chicken


So, I know I already posted another recipe today, but I found this one on Food Gawker, which led me to a blog called KayoticKitchen for the recipe.

Here's Kay's recipe (0=

(or you can follow the link above)


It looks fabulous and I wanted to pin it but I couldn't pin it from there so I'm posting it on my blog in a mini-post so I can pin it to Pinterest.

Have a great day everyone!

Copycat Gatorade Recipe

I don't know about your family, but mine is ALWAYS thirsty.  We stopped buying soda sometime last Fall in an effort to 1.) encourage healthier beverage choices, and 2.) reign in our ridiculously high grocery budget.  

After the "soda strike", I found myself buying way too much Gatorade - a healthier option than soda, for sure, but not such a great choice for the budget.  My group could easily go through an 8-pack of Gatorade in one weekend and that stuff is EXPENSIVE!!  I knew there had to be a better way but I had no idea WHAT the better way would be until I stumbled upon this blog post by Jillee one day.  

It's been my experience with "One Good Thing by Jillee", that her advice is always spot-on.  Her blog is so much fun, if you've never stopped by, I'd highly encourage it.  Especially, if you LOVE a good D-I-Y alternative.

But, enough about the why's - I've made this "Gatorade" a few times now for my family and they LOVE it.  The ingredients list is short and sweet which makes it all the better in my book.  (0=

Jillee's recipe only made one quart of the stuff and if I only made one quart at a time, I'd never get out of the kitchen.  I did the math and a few little tweaks and came up with the following recipe which fills 5 - 20 oz. upcycled Gatorade bottles.  I don't even LIKE Gatorade and I give this drink two thumbs up ;)

Without further ado...........(insert drumroll here)

Copycat Gatorade Recipe (makes approx 3 quarts)


You'll need:

1 1/2 cups Orange Juice
3/4 cups granulated white sugar
3/4 tsp kosher salt (or sea salt)
3 Tbsp lemon juice*
Water

*I've found that 1/2 of a medium sized lemon usually yields about 1 Tbsp of juice

1.  Heat 1 cup water to almost boiling and stir in sugar and salt until completely dissolved.

2. Mix in Orange Juice and lemon juice.


3.  Add enough water to make 3 quarts (I added just a splash more than 9 1/4 cups).

4.  Stir, pour into upcycled Gatorade bottles, and refrigerate.


I can't really speak to how long this will stay good in the refrigerator because it goes FAST around here; but I can say that one bottle got "lost" in the fridge, was discovered a couple of weeks later, and it was still yummy!

So, thanks to Jillee, for a great idea and hooray for my grocery budget :D


Thursday, September 13, 2012

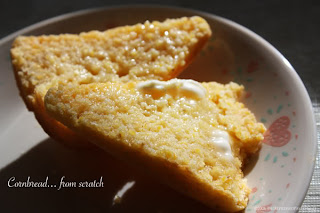
Our Family's Traditional (nothing's better) Cornbread

So, I was browsing around on the internet today and..well, one thing led to another.  You know how it goes, right?  I found a lovely blog post at One Good Thing by Jillee with a fantastic sounding blueberry pancakes recipe and touting a number of reasons why we should ALL own a cast iron skillet.  This got me to thinking about my Mama baking up pan after pan of cornbread for our annual Thanksgiving cornbread dressing and I decided that I really needed to share her recipe (or rather....her mother's recipe) with all the world.  It's just too good to keep it all to myself.

I concur with all of Jillee's reasons why you need a cast iron skillet, and then some; but, this post is about cornbread!!  I love cornbread and it's just NOT the same if it's not baked in a cast iron skillet.  That being said - here is the recipe for my family's delicious cornbread perfection!! (Be forewarned - I never claimed this is the healthiest recipe - lol)


Ingredients:

Yellow Corn Meal           11/3 cup (don't use white - ick!)
Flour                              2/3 cup (all-purpose)
Sugar                             ¼ cup
Salt                                ½ teaspoon
Baking Powder               1 Tbsp
Egg, beaten                    1
Milk                               1 cup (whole milk is best but any milk will do)
Bacon Grease, melty        ¼ cup (can use shortening or 3-4 Tbsp oil but I wouldn't)

Preheat oven to 425°F.  Grease your 10” cast iron skillet.

Mix together dry ingredients in a large mixing bowl.  Add egg, milk and grease.  Beat until smooth using a fork or mixer.  Do not overbeat this - it will be tough and too dense!  Once batter is smooth, pour into greased 10” skillet (you could use a regular baking pan or muffin pan but it just won't be the same, trust me!).   Bake 20 to 25 minutes or until golden brown.

Who could resist such a beautiful mouthful of joy?  Certainly not me.

A lot of ladies commenting on other posts about cast iron cookware had the genius idea to find these treasures at thrift stores and garage sales.  I do not know WHY I never thought of this myself.  I only own ONE cast iron skillet and to buy them new costs an arm and a leg - not to mention that the "pre-seasoned at the factory" pots and pans leave a lot to be desired.  So, if you don't have at least one cast iron cookware item, I would encourage you to go out and find one.  The older and more heavily used they are, the better.  Happy cooking my friends. (0=

Disclaimer:  The images posted here are not mine.  I haven't made this since last Thanksgiving so I currently do not have any of my own pictures.  These photos very closely represent what my finished product looks like.   I've placed links on each photo back to it's source.


Saturday, June 9, 2012

Greek Flatbreads

photo by
http://www.kitchenconnaisseur.com
I wanted to try a recipe that I found for Beef Pitas (here) so I went to the store in search of the pita breads.  What I found was overpriced, unappealing, and quite disheartening so I decided to go on a quest to find a recipe and make my own.


After browsing multiple recipes (which I forgot to write down their web addresses), I mixed and matched according to my family's tastes and came up with this one.  It was insanely delicious; albeit quite time consuming - I hope you'll try it.  (0=


Greek Flatbreads - makes about 15 flatbreads


2 cups warm water, 110-115° F
1 pkg active dry yeast, about 2 ¼ teaspoons
2 tablespoons honey
1/2 cup extra virgin olive oil, plus more for brushing
1/2 cup plain whole milk or low-fat yogurt (not Greek-style)
2 tablespoons butter, melted
7 to 7 ½ cups flour, plus more for dusting
1 tbsp Salt
1 tbsp Garlic Powder
1 tsp Oregano
Additional Salt and Oregano for final seasoning

1. In the bowl of a stand mixer, combine the warm water, yeast and honey. Whisk well, then let stand 10 minutes to allow the yeast to bloom. Stir in the ½ cup oil, milk (or yogurt) and butter.

2. In a large bowl, whisk the flour together with 1 tablespoon salt, garlic powder, and 1 tsp Oregano.  Add to the yeast mixture and mix with the dough hook on low speed or a wooden spoon until a dough forms. Knead with the dough hook or by hand for 5 minutes.  Be careful not to overwork the dough, the more you work yeast dough, the tighter the gluten becomes and the bread gets tough.

3. Drop the full ball of dough into an oiled bowl and flip once to coat with oil.  Cover with plastic wrap or a warm, damp tea towel and let rise in a warm place until doubled in volume, about 1 hour.  (Note:  This looks like a LOT of dough)

4. When the dough has risen to about double divide into equal pieces (I ended up with 15) and shape into balls being careful not to work dough too much.  Place on a parchment-lined baking sheet and dust lightly with flour. Cover with a damp tea towel and let rise in a warm place until doubled in volume, about 1 hour.

5. Line another baking sheet with parchment paper and brush it lightly with oil.  Sprinkle some salt and dried oregano on the oiled paper.  Then, on a lightly floured surface, flatten one ball of dough into a disk. Using a rolling pin, gently stretch the disk into approximately 6-inch round about ¼” thick.

6. Brush the dough with olive oil, then sprinkle with dried oregano and salt. Transfer to the baking sheet. Repeat with the remaining balls of dough, stacking the flattened, seasoned rounds on top of each other in 2 stacks, so they are oiled and seasoned on both sides by contact. Let rest 15 minutes to let the gluten relax.


7. In a lightly oiled (1 to 2 tsp) preheated iron skillet (or other heavy bottomed skillet), cook the flatbread slowly over medium heat until the bread puffs slightly, and the bottom colors lightly, 1 ½ to 2 minutes.  Flip and cook the second side until the bread is cooked through, about 1 ½ to 2 minutes longer.

Time to flip (0=

Here's what the first side looked like.


(Do a test round, let it cool, then cut and check to see if it's baked all the way through. Adjust timing accordingly.)

Transfer to a wire rack to cool for at least 15 minutes before cutting.

Note: Flatbreads keep well for several days in a plastic bag; reheat under a broiler or in a toaster oven. 

Here is my finished bread (0=


NOW I JUST HAVE TO DO IT 14 MORE TIMES - LOL


I also served Greek Vegetable Salad (recipe here) with my pitas and our meal was wonderful.  


Thursday, May 31, 2012

Burger Night - Italian Style

I made these delicious burgers for dinner tonight.  I got my inspiration from the popular Caprese salad.  I didn't have any fresh basil on hand this time but I guarantee that I will be making this again and will definitely include the fresh basil.

I served these burgers with a pasta salad and a fruit salad for sides.  What a great meal.


Ingredients:

1 1/2 lbs. bulk italian sausage
1 red onion, sliced thin
6 slices of mozzarella cheese
1 large tomato, sliced
18 leaves of fresh basil
fresh iceberg or romaine lettuce for burger
Balsamic mayonnaise (recipe follows)
6 poppy seed buns, split

From the italian sausage, form six patties for grilling.  Pre-heat your grill to med-high.  While you're waiting for the grill, p
repare the onions and tomatoes and set out the basil leaves and lettuce leaves for assembly.

Grill the sausage patties for about 4 minutes per side over direct heat.  Place one slice of mozzarella cheese on each patty, turn the grill off and close the lid to allow the cheese to melt.

When the cheese is melted, smear balsamic mayo on each side of the poppy seed bun, pile on the meat, tomatoes, onions, 3 basil leaves, and lettuce and enjoy.  This is truly a super simple, super delicious "burger".

Serves 6


Balsamic Mayo recipe:

1/2 cup mayonnaise

2 1/2 Tablespoons of Balsamic Viniagrette salad dressing.

Mix and serve.


For my fruit salad, I found my inspiration from Taste of Home

http://www.tasteofhome.com/recipes/Honey-Fruit-Salad

The only modification I made here was that I used black seedless grapes instead of green.  This salad is simple and tasty.  A great compliment to these burgers.


I've linked up this recipe to the Weekend Potluck at 4 Little Fergusons.  Stop by over there and say Hello!

Friday, March 30, 2012

A Substitute for Dijon Mustard

Hey, so I had a dipping sauce recipe that called for Dijon Mustard and since, we're not big mustard eaters in our house, I didn't have any on hand.  After just a few minutes searching the internet, I found the following recipe which I whipped together real quick and my sauce turned out great.


I can't give credit to the author because, frankly, I have no idea who it was but I'm super happy that he/she shared the recipe.  Here's the info:

1 Tablespoon dry ground mustard

1 teaspoon water
1 teaspoon white wine vinegar (or white wine if you like)
1 Tablespoon mayonnaise
Pinch of sugar


Mix it all up and voila!  you have a nice substitute for Dijon Mustard.


This recipe yields 2 Tablespoons.


Enjoy
PS - this is a generic photo I found online too (0=